1) Open new file, transparent, size 400 x 400, chose file, save as "falltag.psp".
2) Open "autumnbeautysm.jpg" bear tube - click on it, then chose edit, copy, then click on "falltag.psp" &
edit, paste as a new layer.
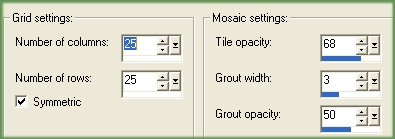
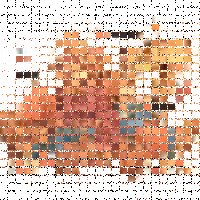
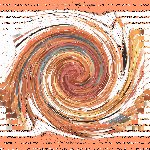
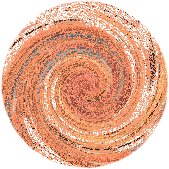
3) Effects, texture, mosaic antique, settings left to right & top to bottom are: 25/25/68/3/50, symmetric. Your image should now look like this:
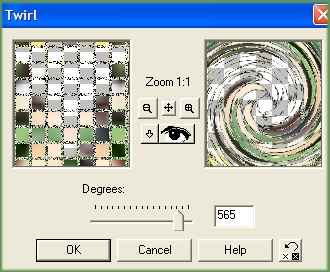
4) Effect geometric, twirl, setting 565, ok.
5) Layer, new, ok, flood fill with #FF996D, move flood filled layer to the bottom. Your image should now look like this:
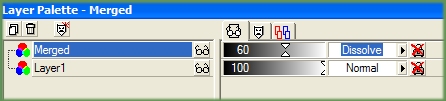
6) Click on twirl layer in layer palatte - click on normal, change to dissolve and change 100 to 60.
7) Layers, merge visable.
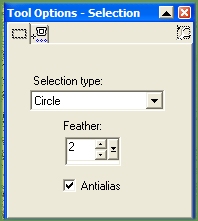
8) Chose selection tool, circle, feather 2, antialias, start at 196, 196 on twirl merged image and pull out to 333,333.
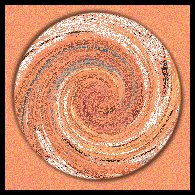
9) Edit, copy, edit, paste as a new image. Your image should now look like this:
10) Shift d, to copy image.
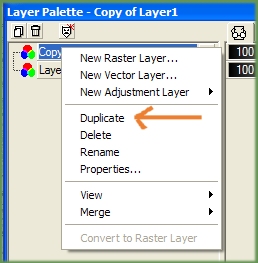
11) Layer duplicate, move duplicate to the edge with your mover.
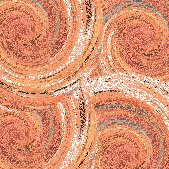
12) Do Step 11 three more times, use mover tool to move duplicated images to 4 different corners, till image is filled with swirl - 5 layers. Merge layers. We will use this image later in Step 20*. Your image should now look like this:
13) Back to image with one swirl.
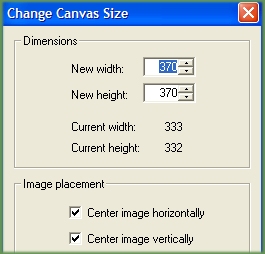
14) Image, canvas size, 370 x370, check mark center vertically & horizontally, new layer, flood fill with orange and bring layer to the bottom, x out swirl layer.
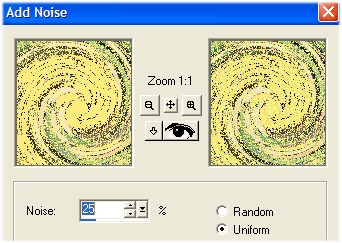
15)Click on background layer, x out swirl, effects, noise, 25% uniform.
16) Take the x off swirl layer.
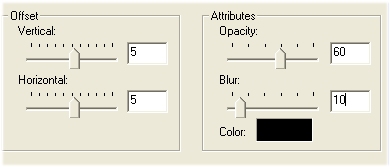
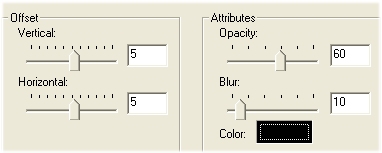
17) Click on swirl layer, effects, drop shadow 5/5 60/10 black, then do again with -5/-5 60/10 black.
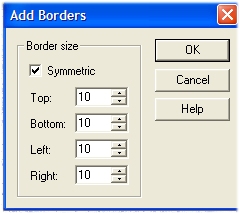
18) Switch background color to black, image, add border yes, 10, symmetric, ok. Your image should now look like this:
19) Click on black border with magic wand.
20) Click on foreground color, chose pattern, click on it and chose the pattern you made in Step 12*
21) Go back to your image where you used the magic wand and flood fill.
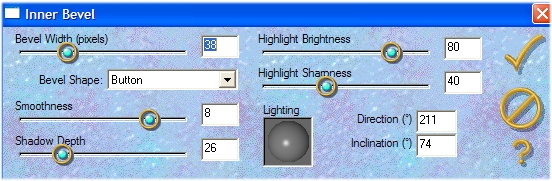
22) Chose effects, plug in filters, eye candy 3.1, inner bevel, chose button bevel shape settings, click on check mark.
23) Keep selected on border, chose drop shadow 5/5/60/10 black, then drop shadow again -5/-5/60/10 black, select none.
24) Add your logo - watermark.
25) Click save. This is your blank tag you can reuse with other tubes.**
26) Click shift d.
27) Work on the copy.
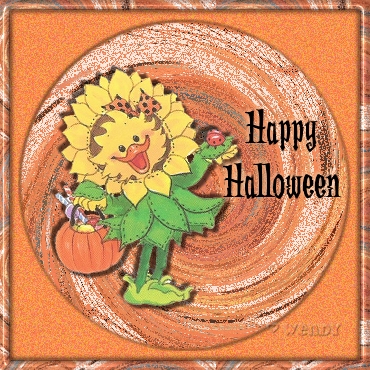
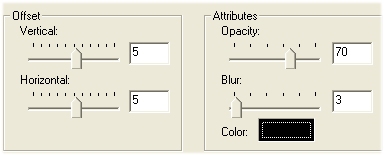
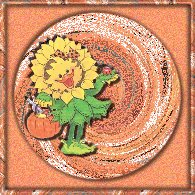
28) Add your tube - mine is the sunflower trick or treater. Open "DC-SuziSunFlwr.psp". shift d - work on copy - image resize 50%, edit copy, click on swirl image, paste as a new layer, use your mover to move it where you want it on the swirl. Drop shadow 5/5/70/3, black then again drop shadow -5/-5/70/3, black. Your image should now look like this:
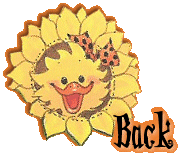
29) Layer new, click on text tool, click on image, chose adams font, fill color black, size 36, bold, click standard text, floating & antialias checked, click ok, position where you want it with mover, then chose effects, 3-D, drop shadow settings 2/2/60/6 white, then drop shadow -2/-2/60/6 #EC7F30, select none.
30) Select layers, merge all.
31) File export jpg., use wizard, better image - to the top, finish, then name the file, save.
32) Congratulations, you are done!
If you saved your blank file - you can go back and reuse that with different text & tubes.** Also, try other tubes and other colors, such as this:
I would love to see your creations! Click on my email button below and email me!